How to set up your iPhoneUpdated 6 months ago
Before you start setting up your new phone, make sure you backup your previous iOS device so you can transfer all of the content to your new device.
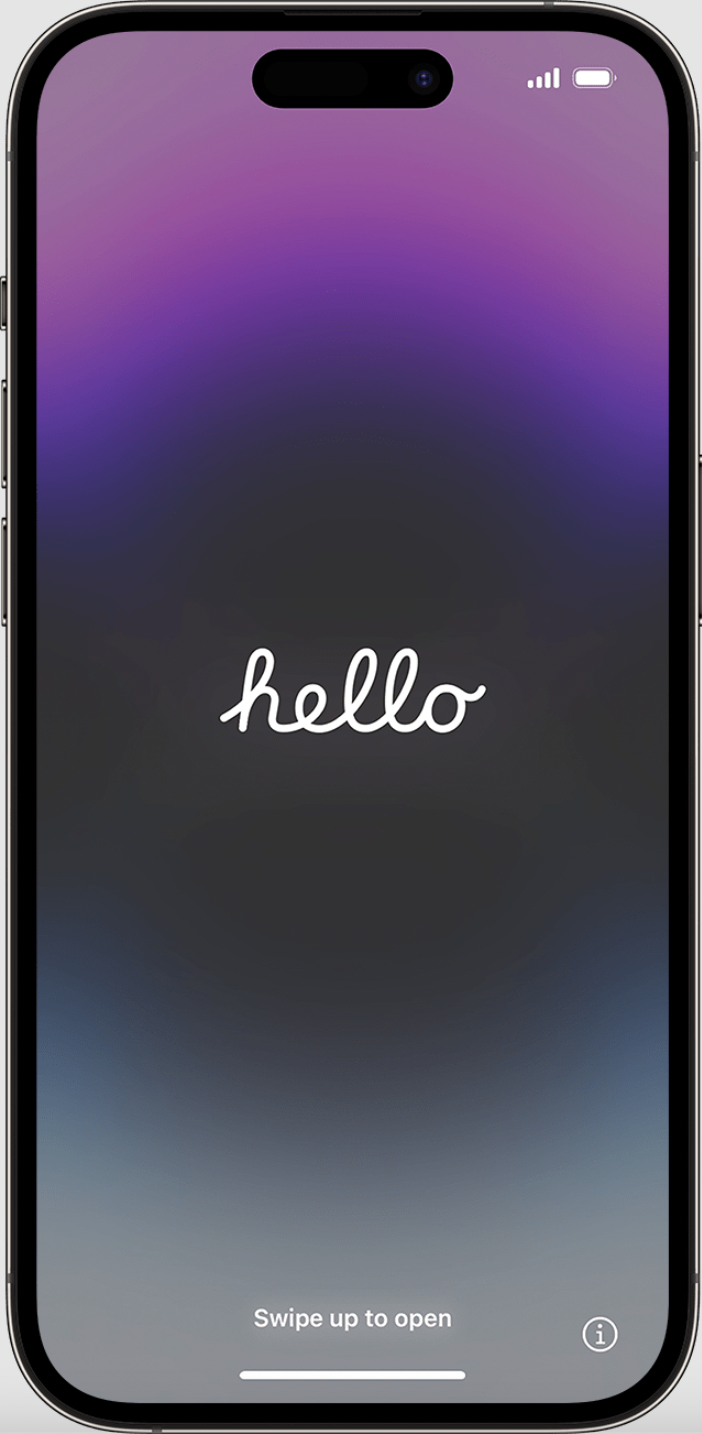
1. Turn on your device
Press and hold the device's power button until you see the Apple logo. You'll then see "Hello" in many languages. Follow the onscreen instructions to get started.
If you’re blind or have low vision, you can turn on VoiceOver or Zoom from the Hello screen.
2. Choose the size of text and icons on your phone
Select your preferred size for text and icons: Default, Medium or Large. As you slide the icon between the different sizes, the text and images on this Appearance screen will change so you can preview the selected option.
When you're ready, slide the icon to your preferred size and tap Continue.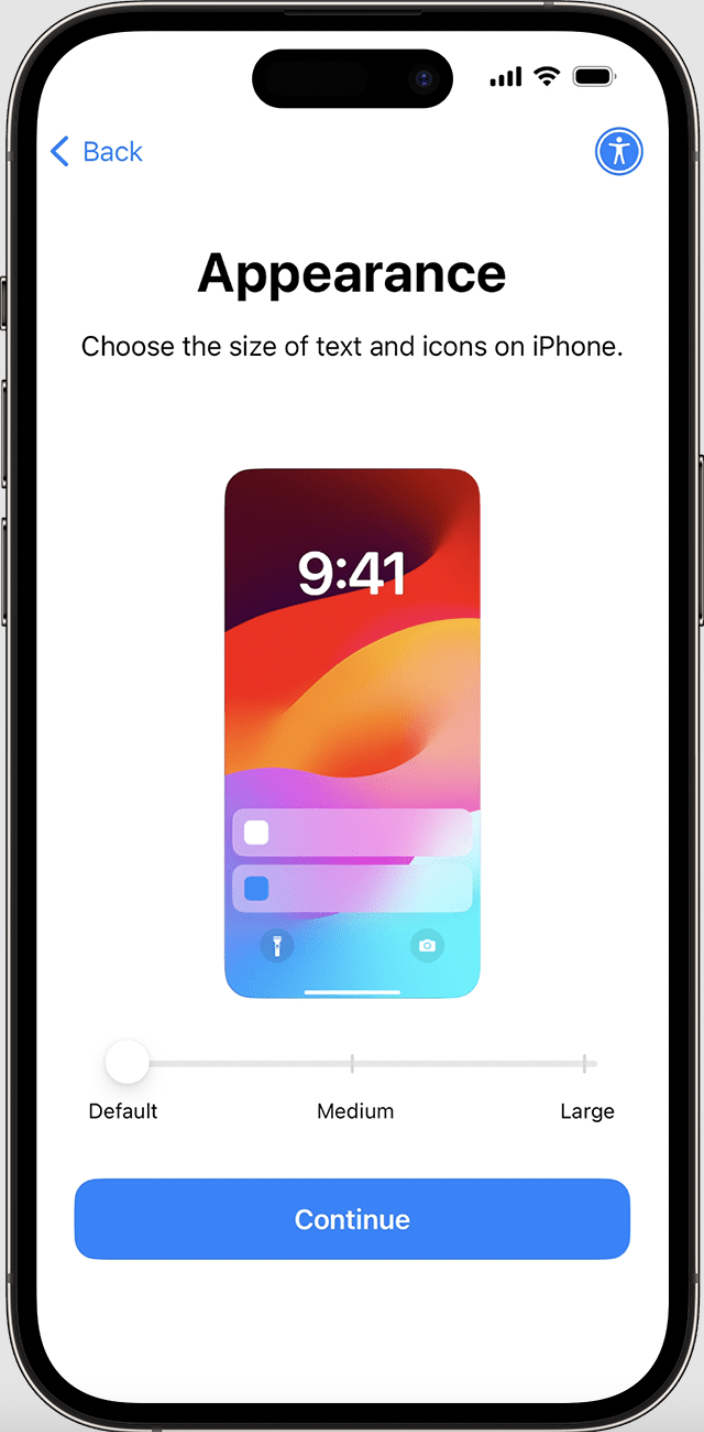
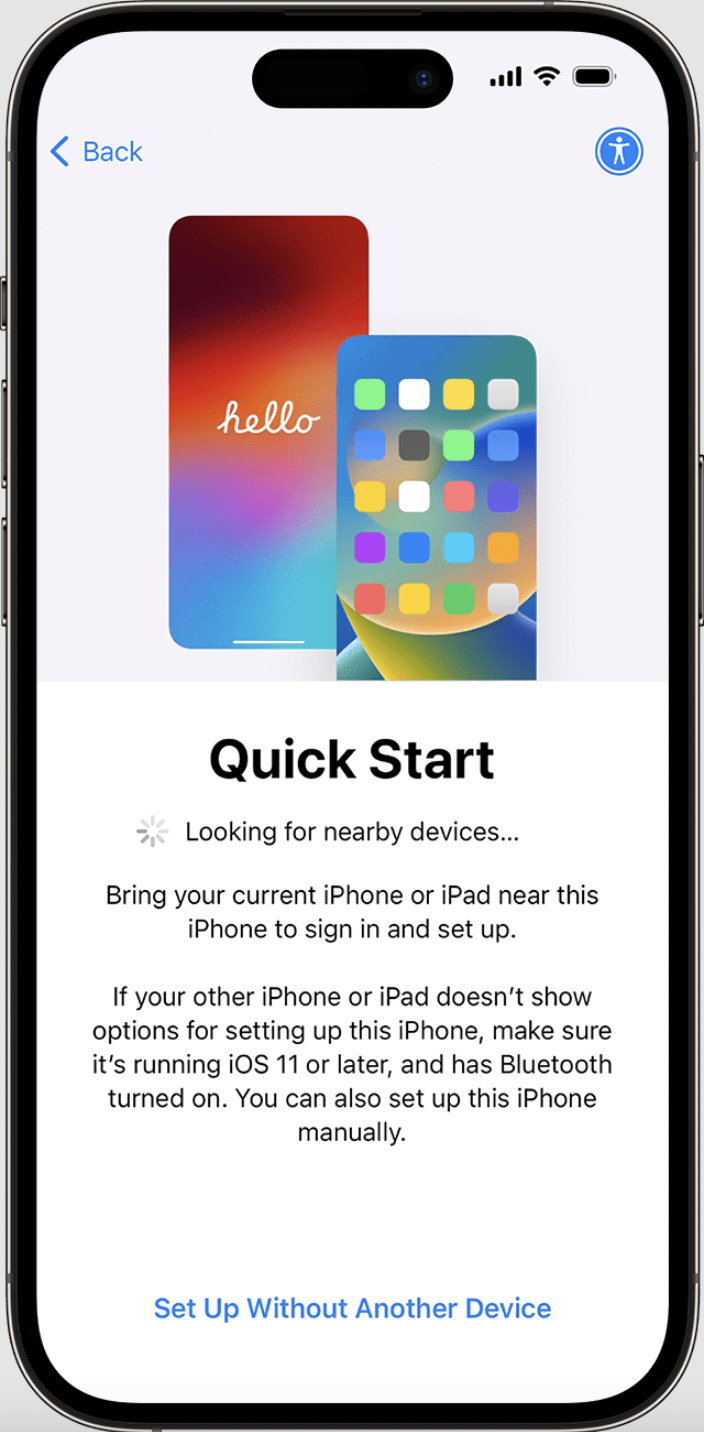
3. Use Quick Start or set up manually
If you have another device, you can use it to automatically set up your new device with Quick Start.
If you don’t have another device, tap Set Up Without Another Device.
4. Activate your iPhone or iPad
You need to connect to a Wi-Fi network or a mobile network to activate and continue setting up your device.
Tap the Wi-Fi network that you want to use or, if available, tap Continue Without Wi-Fi to use your device's mobile network. If you're setting up an iPhone or iPad (Wi-Fi + Cellular), you may need to insert your iPhone SIM cardYou may also be asked to iPad SIM card first. You may also be asked toYou may also be asked to.
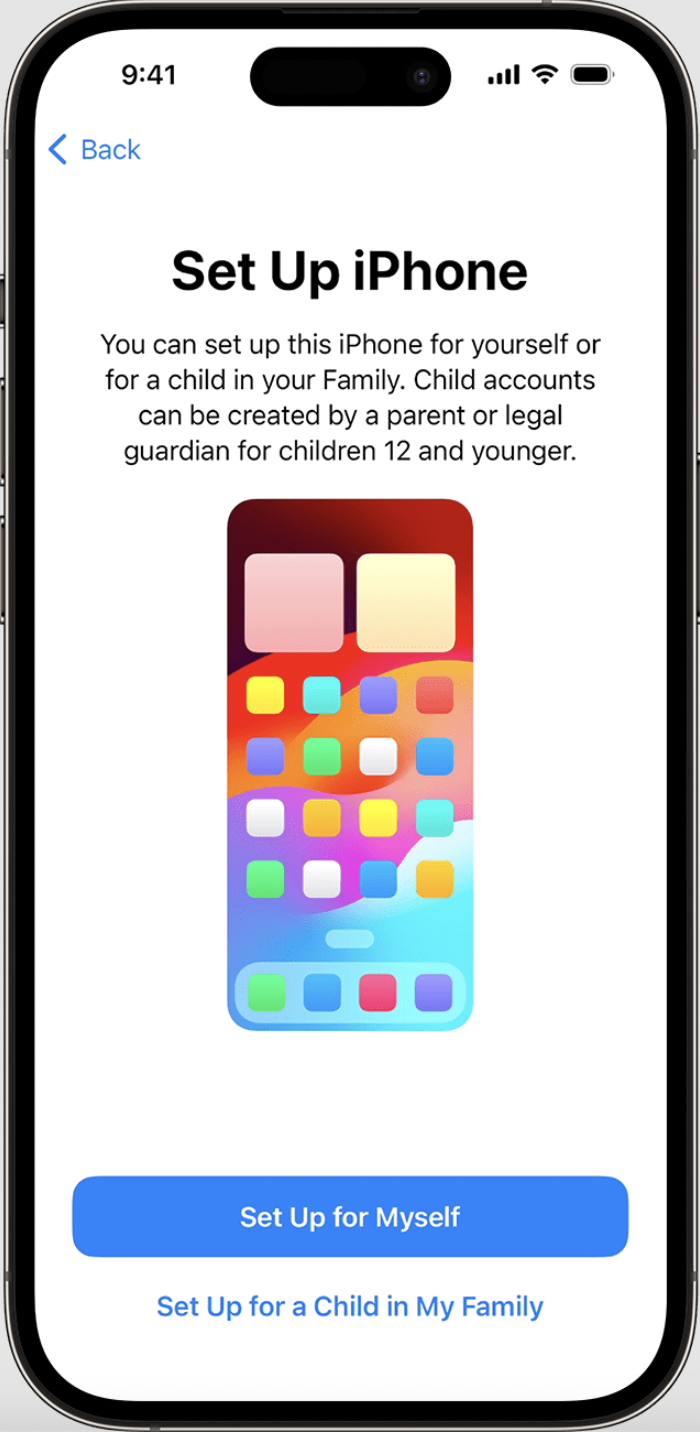
5. Set up for you or for a child
Next, choose whether you want to set up your iPhone for you or for a child. Find out how to create a new Apple ID for a child under 13, how to set up Family Sharing and how to use parental controls on a child’s iPhone.
During the iPhone setup process on iOS 17, you can choose whether the new phone is for you or for a child in your family.
6. Set up Face ID or Touch ID and create a passcode
Follow the onscreen instructions to set up Face ID or Touch ID to use face recognition or your fingerprint to unlock your device and make purchases.
Next, set a six-digit passcode to help protect your data. You need a passcode to use features like Face ID, Touch ID and Apple Pay. If you'd like a four-digit passcode, custom passcode or no passcode, tap Passcode Options.
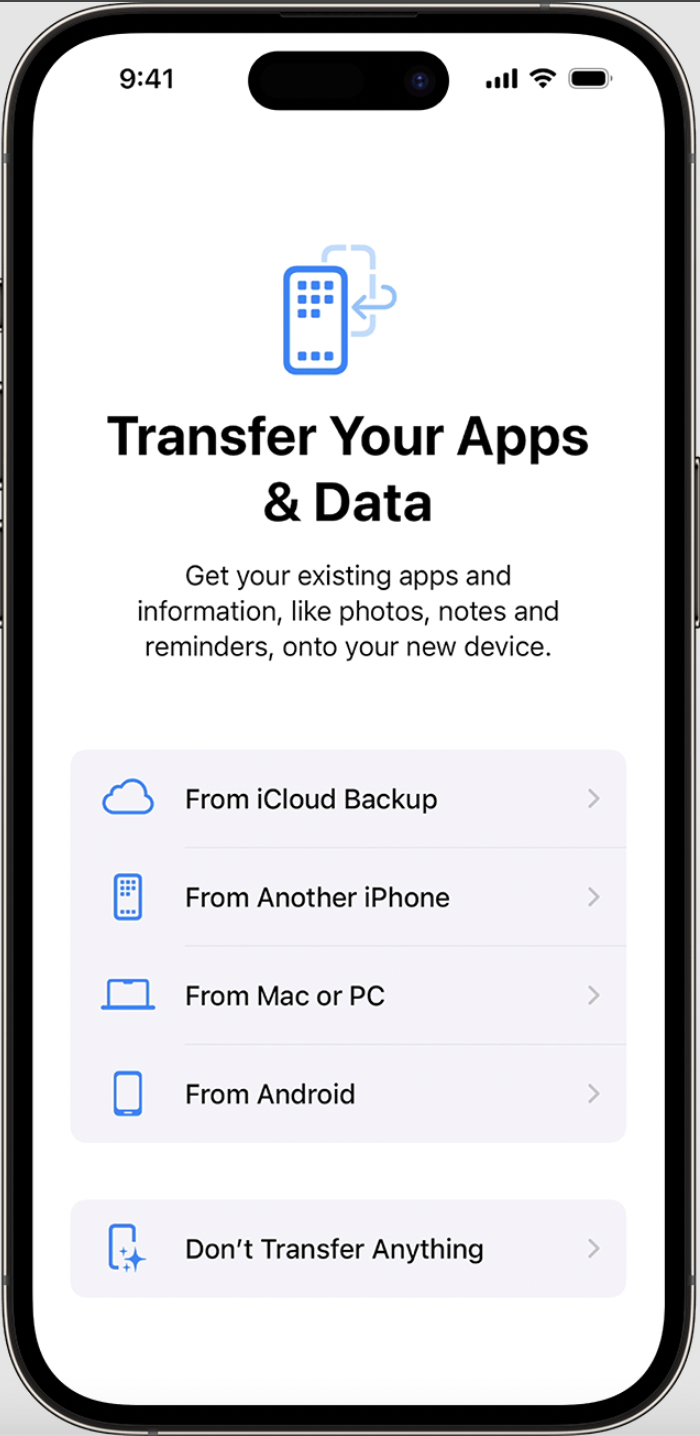
7. Restore or transfer your data and apps
Choose how you want to restore or transfer your data from your old device to your new device. You can use an iCloud backup or a backup made from your computer, or move data from an Android device.
If you don't have a backup or another device, select Don't Transfer Apps & Data.
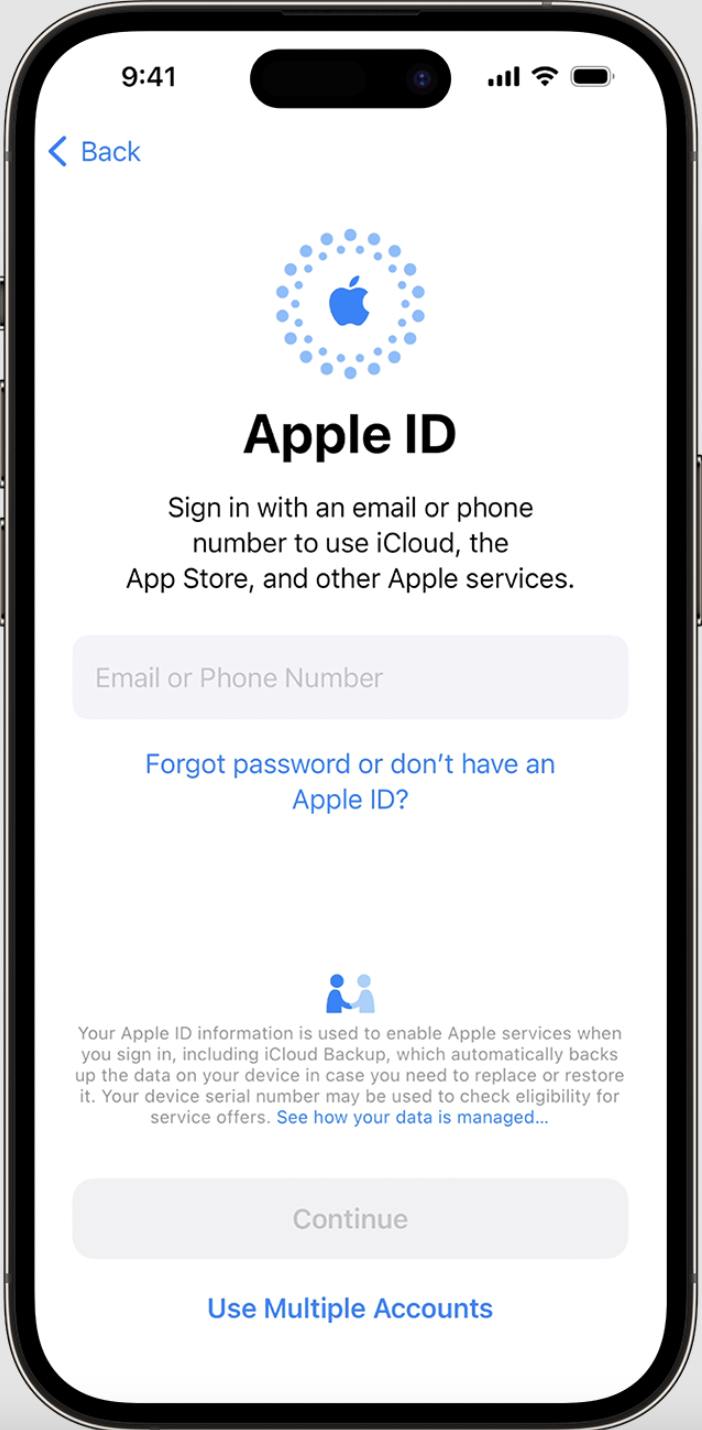
8. Sign in with your Apple ID or another Apple device
Enter the email address or phone number you use with your Apple ID, then enter your password. Or tap “Forgot password or don’t have an Apple ID?” From there, you can recover your Apple ID or password, create an Apple ID or set it up later.
If you use more than one Apple ID, tap Other Sign-In Options, then tap Use Multiple Accounts.
When you sign in with your Apple ID, you might be prompted for a verification code from your previous device.
9. Turn on automatic updates and set up other features
Follow the onscreen instructions to allow iOS or iPadOS to update automatically and set up other features, such as your mobile data service and a phone number or Apple Pay:
You’ll be asked to set up or enable services and features, such as Siri. On some devices, you'll be asked to say a few phrases so that Siri can get to know your voice.
Then, follow the onscreen instructions to set up Screen Time, which gives you insight into how much time you and your children spend on your devices. It also lets you set time limits for daily app use.
Next, find out more about the data you can share with Apple and choose whether you want to share data with app developers.
Finally, tap on Light or Dark to see a preview of how your iPhone adjusts. Tap Auto to enable your iPhone to switch between both modes automatically throughout the day. When you’re ready, tap Continue to finish the process.